İşletim sistemi olarak genelde linux kullansamda özel durumlarda Solaris kullanmaktan vazgeçemiyorum. Uzun zamandır çalışan solaris sistemimi(disk ünitesi olarak çalışıyor) bu gün solaris 11 expresten solaris 11 yükseltmek istedim ve yükselttim.
Yükseltmenin bu kadar basit olduğu bir başka işletim sistemi mevcut değil
Solarisini yükseltemek isteyenler;
http://docs.oracle.com/cd/E23824_01/html/E24456/upgrade-2.html#scrolltoc
linkinden faydalanabilir.
Yükseltme sonunda
http://docs.oracle.com/cd/E23824_01/html/E24456/gliyc.html
Sayfasına bakmakta faydalı olur.
23 Aralık 2011 Cuma
21 Aralık 2011 Çarşamba
samba3 ve windows 7
samba 3 ü dc olarak kullanıyorsanız ve windows 7 nizi samba 3 ilave edemiyorsanız,
aşağıdakı regedit dosyasını kullanabilirsiniz.
-------------------------------------
Win7_Samba3DomainMember_jelledj.reg
-------------------------------------
Windows Registry Editor Version 5.00
; Win7_Samba3DomainMember
[HKEY_LOCAL_MACHINE\System\CurrentControlSet\Services\LanManWorkstation\Parameters]
"DNSNameResolutionRequired"=dword:00000000
"DomainCompatibilityMode"=dword:00000001
; Speedup settings
[HKEY_LOCAL_MACHINE\SOFTWARE\Policies\Microsoft\Windows\System]
"SlowLinkDetectEnabled"=dword:00000000
"DeleteRoamingCache"=dword:00000001
"WaitForNetwork"=dword:00000000
"CompatibleRUPSecurity"=dword:00000001
; Can drive you nuts
[HKEY_LOCAL_MACHINE\SOFTWARE\Microsoft\Windows\CurrentVersion\Policies\System]
"EnableLUA"=dword:00000000
18 Aralık 2011 Pazar
openvpn access serverda belli ağları, openvpnas dışında tutmak
openvpnas bizim varsayılan çıkış kapımız ve bazı networkleri openvpn den çıkmasını istemiyorsak yapmamız gerekenler;
Advanced VPN -->>Additional OpenVPN Config Directives (Advanced) -->>Server Config Directives
push "route 1.2.3.0 255.255.255.0 net_gateway"
push "route 2.3.4.0 255.255.255.0 net_gateway"
net_gateway parametresi; 1.2.3.0 ve 2.3.4.0 ağları için çıkış kapısı olarak,
openvpnas bağlantısından önceki mevcut çıkış kapısı olması sağlanır.
net_gatewayi ihtiyacımıza göre değiştirebiliriz.
7 Aralık 2011 Çarşamba
openvpn access serverda sqilte tan mysql'e geçiş
openvpn access serverda tüm bilgileri sqliteta tutuyorsak;
Kurulum esnasında veya sonrasında "User Authentication"
"Authenticate users using" local seçerek sqlite kullanmaya başladıktan sonra mysql ile kullanmak istersek;
1. ~/.my.cnf dosyası ayarlanır.
2. Gerekli databaseler oluşturulur.
mysql> create database as_certs;
Query OK, 1 row affected (0.02 sec)
mysql> create database as_userprop;
Query OK, 1 row affected (0.00 sec)
mysql> create database as_config;
Query OK, 1 row affected (0.00 sec)
mysql> create database as_log;
Query OK, 1 row affected (0.00 sec)
3. Mevcut veriler mysql aktarılır,
/usr/local/openvpn_as/scripts# ./dbcvt -t 'config' --src=sqlite:////usr/local/openvpn_as/etc/db/config.db --dest=mysql://127.0.0.1/as_config
root@mail:/usr/local/openvpn_as/scripts# ./dbcvt -t 'certs' --src=sqlite:////usr/local/openvpn_as/etc/db/certs.db --dest=mysql://127.0.0.1/as_certs
root@mail:/usr/local/openvpn_as/scripts# ./dbcvt -t 'log' --src=sqlite:////usr/local/openvpn_as/etc/db/log.db --dest=mysql://127.0.0.1/as_log
root@mail:/usr/local/openvpn_as/scripts# ./dbcvt -t 'user_prop' --src=sqlite:////usr/local/openvpn_as/etc/db/userprop.db --dest=mysql://127.0.0.1/as_userprop
4. /usr/local/openvpn_as/etc/as.conf dosyasında aşağıdaki değişiklikler yapılır.
# certificates database
# certs_db=sqlite:///~/db/certs.db
certs_db=mysql://127.0.0.1/as_certs
# user properties DB
# user_prop_db=sqlite:///~/db/userprop.db
user_prop_db=mysql://127.0.0.1/as_userprop
# configuration DB
#config_db=sqlite:///~/db/config.db
config_db=mysql://127.0.0.1/as_config
# log DB
#log_db=sqlite:///~/db/log.db
log_db=mysql://127.0.0.1/as_log
5. Son adım olarak openvpnas servisini durdurarak yeniden başlatırız.
6 Aralık 2011 Salı
openvpn access serverı mysql ile kullanmak
openvpn access server varsayılan olarak yerel sqlite kullanmaktadır.
Şayet biz bilgilerimizi sqlite yerine mysqlde tutmak istiyorsak;
1. mysql serverda as_certs, as_userprop, as_config, as_log databaselerini açıyoruz.
2. /root/.my.cnf yi ayarlıyoruz ki openvpnas direk mysql bağlanabilirsin.
cat ~/.my.cnf
[client]
port=3306
#socket=/var/run/mysqld/mysqld.sock
host=127.0.0.1
password="parolanızı buraya yazın"
.my.cnf nin dosya sahiplik yetkileri olarak 600/400 (keyfinize göre) verirseniz iyi.
3. olarak as_templ.conta aşağıdaki değişiklikleri yapıyoruz.
/usr/local/openvpn_as# grep db etc/as_templ.conf
# certs_db=sqlite:///~/db/certs.db
certs_db=mysql://127.0.0.1/as_certs
# user_prop_db=sqlite:///~/db/userprop.db
user_prop_db=mysql://127.0.0.1/as_userprop
# config_db=sqlite:///~/db/config.db
config_db=mysql://127.0.0.1/as_config
# log_db=sqlite:///~/db/log.db
log_db=mysql://127.0.0.1/as_log
4. son aşama olarak
/usr/local/openvpn_as/bin/ovpn-init
çalıştırıyorsunuz ve yerel database kullanılmasını istiyoruz.
Use local authentication via internal DB?
> Press ENTER for default [no]: yes
Hepsi bu kadar.
ÖNEMLİ HATIRLATMA BU BİLGİ TÜM BİLGİLERİNİ SİLER/SİLEBİLİR!!!
ovpn-init tüm çıktısı;
root@rwx:/usr/local/openvpn_as/etc# /usr/local/openvpn_as/bin/ovpn-init
Detected an existing OpenVPN-AS configuration.
Continuing will delete this configuration and restart from scratch.
Please enter 'DELETE' to delete existing configuration: DELETE
Stopping openvpnas daemon...
OpenVPN Access Server
Initial Configuration Tool
------------------------------------------------------
OpenVPN Access Server End User License Agreement (OpenVPN-AS EULA)
1. Copyright Notice: OpenVPN Access Server License;
Copyright (c) 2009-2011 OpenVPN Technologies, Inc.. All rights reserved.
"OpenVPN" is a trademark of OpenVPN Technologies, Inc.
2. Redistribution of OpenVPN Access Server binary forms and documents,
are permitted provided that redistributions of OpenVPN Access Server
binary forms and documents must reproduce the above copyright notice.
3. You agree not to reverse engineer, decompile, disassemble, modify, translate,
make any attempt to discover the source code of this software, or create
derivative works from this software.
4. The OpenVPN Access Server is bundled with other open source software
components, some of which fall under different licenses. By using
OpenVPN or any of the bundled components, you agree to be bound by
the conditions of the license for each respective component.
See /usr/local/openvpn_as/license.txt in the Access Server distribution
for more info.
5. THIS SOFTWARE IS PROVIDED "AS IS" AND ANY EXPRESSED OR IMPLIED WARRANTIES,
INCLUDING, BUT NOT LIMITED TO, THE IMPLIED WARRANTIES OF MERCHANTABILITY
AND FITNESS FOR A PARTICULAR PURPOSE ARE DISCLAIMED. IN NO EVENT SHALL
OPENVPN TECHNOLOGIES, INC BE LIABLE FOR ANY DIRECT, INDIRECT, INCIDENTAL,
SPECIAL, EXEMPLARY, OR CONSEQUENTIAL DAMAGES (INCLUDING, BUT NOT LIMITED
TO, PROCUREMENT OF SUBSTITUTE GOODS OR SERVICES; LOSS OF USE, DATA, OR
PROFITS; OR BUSINESS INTERRUPTION) HOWEVER CAUSED AND ON ANY THEORY OF
LIABILITY, WHETHER IN CONTRACT, STRICT LIABILITY, OR TORT (INCLUDING
NEGLIGENCE OR OTHERWISE) ARISING IN ANY WAY OUT OF THE USE OF THIS
SOFTWARE, EVEN IF ADVISED OF THE POSSIBILITY OF SUCH DAMAGE.
Please enter 'yes' to indicate your agreement [no]: yes
Once you provide a few initial configuration settings,
OpenVPN Access Server can be configured by accessing
its Admin Web UI using your Web browser.
Will this be the primary Access Server node?
(enter 'no' to configure as a backup or standby node)
> Press ENTER for default [yes]:
Please specify the network interface and IP address to be
used by the Admin Web UI:
(1) all interfaces: 0.0.0.0
(2) eth0: 192.168.254.254
(3) vmnet2: 192.168.248.1
(4) vmnet8: 172.16.148.1
(5) tun0: 172.16.2.4
Please enter the option number from the list above (1-5).
> Press Enter for default [2]:
Please specify the port number for the Admin Web UI.
> Press ENTER for default [943]:
Please specify the TCP port number for the OpenVPN Daemon
> Press ENTER for default [443]:
Should client traffic be routed by default through the VPN?
> Press ENTER for default [yes]:
Should client DNS traffic be routed by default through the VPN?
> Press ENTER for default [yes]:
Use local authentication via internal DB?
> Press ENTER for default [no]: yes
Private subnets detected: ['172.16.2.0/24', '172.16.148.0/24', '192.168.248.0/24', '192.168.254.0/24']
Should private subnets be accessible to clients by default?
> Press ENTER for default [yes]:
To initially login to the Admin Web UI, you must use a
username and password that successfully authenticates you
with the host UNIX system (you can later modify the settings
so that RADIUS or LDAP is used for authentication instead).
You can login to the Admin Web UI as "openvpn" or specify
a different user account to use for this purpose.
Do you wish to login to the Admin UI as "openvpn"?
> Press ENTER for default [yes]:
> Please specify your OpenVPN-AS license key (or leave blank to specify later):
Initializing OpenVPN...
Adding new user login...
useradd -s /sbin/nologin "openvpn"
Writing as configuration file...
Perform sa init...
Wiping any previous userdb...
Creating default profile...
Modifying default profile...
Adding new user to userdb...
Modifying new user as superuser in userdb...
Getting hostname...
Hostname: rwx
Preparing web certificates...
Getting web user account...
Adding web group account...
Adding web group...
Adjusting license directory ownership...
Initializing confdb...
Generating init scripts...
Generating PAM config...
Generating init scripts auto command...
Starting openvpnas...
NOTE: Your system clock must be correct for OpenVPN Access Server
to perform correctly. Please ensure that your time and date
are correct on this system.
Initial Configuration Complete!
You can now continue configuring OpenVPN Access Server by
directing your Web browser to this URL:
https://192.168.254.254:943/admin
Login as "openvpn" with the same password used to authenticate
to this UNIX host.
During normal operation, OpenVPN AS can be accessed via these URLs:
Admin UI: https://192.168.254.254:943/admin
Client UI: https://192.168.254.254:943/
See the Release Notes for this release at:
http://www.openvpn.net/access-server/rn/openvpn_as_1_8_3.html
root@rwx:/usr/local/openvpn_as/etc#
5 Aralık 2011 Pazartesi
En güvenli çep telefonu
Söyleyin bakalım en güvenli çep telefonu hangi marka veya nasıl bir telefondur?
Peşinen söyleyeyim, çeptelefonunda güvenli olmasını istiyorsanız, öncelikle sar değeri düşük olacak ve sadece konuşma özelliği olan çep telefonu alınız. Ne kamare, ne bluetooth, ne kablosuz, nede gps desteği olsun.
Böyle bir telefon biliyorsanız ve piyasada varsa banada söyleyin, bende alayım da kafam rahat etsin. :-)
Gereksiz mi? Gerekli mi?
Sizlere bir iki link veriyorum.
Canınız sıkıldığında ne işe yaradığını araştırırsınız. :-D
http://crl.microsoft.com/pki/crl/products/MicrosoftCodeVerifRoot.crl
http://crl.verisign.com/tss-ca.crl
http://crl.verisign.com/ThawteTimestampingCA.crl
http://crl.verisign.com/pca3.crl
http://csc3-2010-aia.verisign.com/CSC3-2010.cer
Canınız sıkıldığında ne işe yaradığını araştırırsınız. :-D
http://crl.microsoft.com/pki/crl/products/MicrosoftCodeVerifRoot.crl
http://crl.verisign.com/tss-ca.crl
http://crl.verisign.com/ThawteTimestampingCA.crl
http://crl.verisign.com/pca3.crl
http://csc3-2010-aia.verisign.com/CSC3-2010.cer
2 Aralık 2011 Cuma
Türkçe linuxe vmware yüklemek
Türkçe linux kullanıyorsanız, vmware workstation kurmak istediğinizde
aşağıdaki gibi aksaklık çıkacak ve kurulum tamamlanamayacaktır.
Tamamlayabilimke için aşağıda gördügünüz gibi dil değişkenini "C" yaparak kurulumu tamamlayabilir
ve vmware kullanabilirsiniz.
root@rwx:~# ./VMware-Workstation-Full-8.0.1-528992.x86_64.bundle
Extracting VMware Installer...done.
File "/usr/lib/vmware-installer/2.0/python/lib/sqlite3/dbapi2.py", line 0
SyntaxError: ('unknown encoding: ISO-8859-1', ('/usr/lib/vmware-installer/2.0/python/lib/sqlite3/dbapi2.py', 0, 0, None))
root@rwx:~# export LC_ALL=C
root@rwx:~# export LC_LANG=C
root@rwx:~# ./VMware-Workstation-Full-8.0.1-528992.x86_64.bundle
Extracting VMware Installer...done.
root@rwx:~#
snapshot ve clone
Uzun bir süreden sonra buraya bir şeyler yazayım dedim.
Kullandığımız disk ne kadar büyük olursa, o kadar çabuk doluyor.
Çabuk dolmasının nedenlerinden biride aldığımız snapshotlar..
Sistemimdeki disk alanı azalınca, disk kullanımını kontrol ettim.
20GB lık sanal sistemin ~100GB bir alan kapladığını gördüm.
Nasıl 20GB lik bir alan bu kadar büyük bir alan kaplar demeyin.
Benim gibi snapshotları temizlemezseniz 100GB de kaplar, 1000GB de...
Bu vesile ile snapshot mekanizmasını kullanan arkadaşlara hatırlatma yapayım dedim.
Gereksiz ve eski snapshotları temizlemeyi unutmayınız!!!
Snapshot aldığınız nokta önemli bir nokta ise oranın clone alın ve snapshotı temizleyin.
Sizlere çinden yeni yıl hediyesi olarak bir kaç klip göndereyim dedim.
http://wiki.serbestyazilim.com/indir/06_20_CDD_0023A-01.mkv
http://wiki.serbestyazilim.com/indir/06_20_CDD_0023A-02.mkv
http://wiki.serbestyazilim.com/indir/06_20_CDD_0023A-03.mkv
http://wiki.serbestyazilim.com/indir/06_20_CDD_0023A-04.mkv
http://wiki.serbestyazilim.com/indir/06_20_CDD_0023A-05.mkv
http://wiki.serbestyazilim.com/indir/06_20_CDD_0023A-06.mkv
http://wiki.serbestyazilim.com/indir/06_20_CDD_0023A-07.mkv
http://wiki.serbestyazilim.com/indir/06_20_CDD_0023A-08.mkv
http://wiki.serbestyazilim.com/indir/06_20_CDD_0023A-09.mkv
http://wiki.serbestyazilim.com/indir/06_20_CDD_0023A-10.mkv
http://wiki.serbestyazilim.com/indir/06_20_CDD_0023A-11.mkv
http://wiki.serbestyazilim.com/indir/06_20_CDD_0023A-12.mkv
http://wiki.serbestyazilim.com/indir/06_20_CDD_0023A-13.mkv
http://wiki.serbestyazilim.com/indir/06_20_CDD_0023A-14.mkv
http://wiki.serbestyazilim.com/indir/06_20_CDD_0023A-15.mkv
http://wiki.serbestyazilim.com/indir/06_20_CDD_0023A-16.mkv
http://wiki.serbestyazilim.com/indir/06_20_CDD_0023A-17.mkv
http://wiki.serbestyazilim.com/indir/06_20_CDD_0023A-18.mkv
http://wiki.serbestyazilim.com/indir/06_20_CDD_0023A-19.mkv
http://wiki.serbestyazilim.com/indir/06_20_CDD_0023A-20.mkv
http://wiki.serbestyazilim.com/indir/06_20_CDD_0023A-21.mkv
http://wiki.serbestyazilim.com/indir/06_20_CDD_0023A-22.mkv
http://wiki.serbestyazilim.com/indir/06_20_CDD_0023A-23.mkv
http://wiki.serbestyazilim.com/indir/06_20_CDD_0023A-24.mkv
http://wiki.serbestyazilim.com/indir/06_20_CDD_0023A-25.mkv
http://wiki.serbestyazilim.com/indir/06_20_CDD_0023A-26.mkv
http://wiki.serbestyazilim.com/indir/06_20_CDD_0023A-27.mkv
http://wiki.serbestyazilim.com/indir/06_20_CDD_0023A-28.mkv
http://wiki.serbestyazilim.com/indir/06_20_CDD_0023A-29.mkv
http://wiki.serbestyazilim.com/indir/06_20_CDD_0023A-30.mkv
http://wiki.serbestyazilim.com/indir/06_20_CDD_0023A-31.mkv
http://wiki.serbestyazilim.com/indir/06_20_CDD_0023A-32.mkv
http://wiki.serbestyazilim.com/indir/06_20_CDD_0023A-33.mkv
http://wiki.serbestyazilim.com/indir/06_20_CDD_0023A-34.mkv
http://wiki.serbestyazilim.com/indir/06_20_CDD_0023A-35.mkv
http://wiki.serbestyazilim.com/indir/06_20_CDD_0023A-36.mkv
http://wiki.serbestyazilim.com/indir/06_20_CDD_0023A-37.mkv
http://wiki.serbestyazilim.com/indir/06_20_CDD_0023A-38.mkv
http://wiki.serbestyazilim.com/indir/06_20_CDD_0023A-39.mkv
http://wiki.serbestyazilim.com/indir/06_20_CDD_0023A-40.mkv
http://wiki.serbestyazilim.com/indir/06_20_CDD_0023A-41.mkv
Umarım beğenirsiniz.
8 Eylül 2011 Perşembe
Çinden selamlar
Merhaba,
Çine geleli neredeyse 40 gün olacak.
Her ne kadar, önyargılarımızdan dolayı bir çoğumuz çin hakkında iyi düşüncelerimiz olsada,
bu ön yargıları bir kenara bırakıp çin doğru olarak tanımamız gerektiğini düşünüyorum.
Öncelikle çinliler hep ufak tefek insanlar diye biliriz. Büyük bir yalnış.
Bilmemiz gereken diğer bir nokta ise çok çalışkan oldukları.
Uyku dışında, ya çalışıyorlar, ya spor yapıyorlar, yada yemek yiyorlardır.
Her sabah ve akşam spor yapıyorlar.
Kısaca boş duranları yok. Kadın erkek ayrımıda yok.
Bizde kadın, çöpçü, inşaat işçisi, otobüs şöförü görmek nadir, neredeyse imkansızdır.
Burada ise bunları yapmak doğal bir şey.
İşin özü çalışkan bir millet.
Fakat gençleride bizler gibi olmaya başlamışlar.
Sabah/akşam sporu yapmıyorlar. KFC veya Mac. gidip ayak üstü atıştırıyorlar.
Her tarafta kfc, mac. ve seven11 var.
Şimdilik bu kadar, arkası 40. günde...
29 Temmuz 2011 Cuma
Hayırlı bir ramazan ayı
Selamlar,
Ramazan ayı ile birlikte biraz uzun bir yolculuğa çıkıyorum.
Yolculuk öncesi, tüm varlıklara hayırlı bir ramazan dileği ve
genc arkadaşlarımızın "Bu Ramazan 'Somali için' eğlenmeyin!"
çağrısı ile şimdilik görüşmek üzere, hoşca ve dostca kalın.
Ramazan ayı ile birlikte biraz uzun bir yolculuğa çıkıyorum.
Yolculuk öncesi, tüm varlıklara hayırlı bir ramazan dileği ve
genc arkadaşlarımızın "Bu Ramazan 'Somali için' eğlenmeyin!"
çağrısı ile şimdilik görüşmek üzere, hoşca ve dostca kalın.
14 Temmuz 2011 Perşembe
ters proxy (reverse proxy) dedikleri şey;
proxy hizmetini genelde bilmeyenimiz yoktur.
tersine proxyi ise ihtiyacı olmayanlar dışında kimse pek bilmez.
Kimin ihtiyacı olabilir diye soracak olursak;
1. statik dosyaların bol olduğu web sunucularının yükünü azaltmak isteyenler
2. web hizmetinin önüne $$$$$ para verip, loadbalancer cihazı almak istemeyenler
3. Tek bir ip no üzerinden farklı web sayfalarına, farklı web sunucularından hizmet vermek isteyenler
Bu işlem için hangi programı kullanabiliriz; squid, varnish, apache, nginx?
Bana göre nginx.
Neden mi?
Sade, küçük ve basit yapılandırmasından dolayı.
İşte size basit bir örnek;
(Tek ip no üzerinden, farklı web sayfalarını, farklı web sunucularından yayınlamak için)
nginx varsayılan ayarlarına aşağıdakilerin ilave etmemiz yeterli oluyor;
server {
listen 80;
server_name www.deneme.com;
proxy_redirect off;
proxy_set_header Host $host;
proxy_set_header X-Real-IP $remote_addr;
proxy_set_header X-Forwarded-For $proxy_add_x_forwarded_for;
proxy_max_temp_file_size 0;
client_max_body_size 8m;
client_body_buffer_size 128k;
proxy_connect_timeout 10;
proxy_send_timeout 120;
proxy_read_timeout 120;
proxy_buffer_size 4k;
proxy_buffers 4 32k;
proxy_busy_buffers_size 64k;
proxy_temp_file_write_size 64k;
access_log /var/log/nginx/deneme.access.log;
error_log /var/log/nginx/deneme.hata.log;
location / {
proxy_pass http://172.16.250.253/;
}
}
server {
listen 80 ;
server_name wiki ;
proxy_redirect off;
proxy_set_header Host $host;
proxy_set_header X-Real-IP $remote_addr;
proxy_set_header X-Forwarded-For $proxy_add_x_forwarded_for;
proxy_max_temp_file_size 0;
client_max_body_size 8m;
client_body_buffer_size 128k;
proxy_connect_timeout 120;
proxy_send_timeout 120;
proxy_read_timeout 120;
proxy_buffer_size 4k;
proxy_buffers 4 32k;
proxy_busy_buffers_size 64k;
proxy_temp_file_write_size 64k;
access_log /var/log/nginx/wiki.access.log;
error_log /var/log/nginx/wiki.hata.log;
location / {
proxy_pass http://wiki.serbestyazilim.com/;
}
}
Nginx hakkında yazılmış, çok faydalı iki kitab mevcut.
Bu kitablar nginx kullanıcılarının olmazsa olmazı diyebilirim.
1. Nginx 1 webserver implementation cookbook
Dipankar Sarkar - PACKT yayınları
2. Nginx HTTP server
Clement Nedelcu - PACKT yayınları
Nginx ile iyi eğlenceler dilerim :-)
12 Temmuz 2011 Salı
sysctl.conf dosyam
Şu anda çalışan sistemimde kullandığım sysctl.conf dosyasının içeriği;
fs.file-max = 1048576
kernel.core_uses_pid = 1
kernel.domainname = serbestyazilim.com
kernel.msgmnb = 65536
kernel.printk = 3 4 1 3
kernel.shmall = 4294967296
kernel.shmmax = 68719476736
net.core.netdev_max_backlog = 131072
net.core.rmem_default = 33554320
net.core.rmem_max = 33554320
net.core.somaxconn = 1024
net.core.wmem_default = 83886080
net.core.wmem_max = 83886080
net.ipv4.conf.all.accept_redirects = 0
net.ipv4.conf.all.rp_filter = 1
net.ipv4.conf.default.accept_source_route = 0
net.ipv4.conf.default.rp_filter = 1
net.ipv4.conf.default.rp_filter = 1
net.ipv4.ip_forward = 1
net.ipv4.ip_local_port_range = 1025 65535
net.ipv4.ip_nonlocal_bind = 1
net.ipv4.tcp_fin_timeout = 3
net.ipv4.tcp_max_syn_backlog = 131072
net.ipv4.tcp_synack_retries = 2
net.ipv4.tcp_syncookies = 1
net.ipv4.tcp_syn_retries = 2
net.ipv4.tcp_tw_recycle = 1
net.ipv4.tcp_tw_reuse = 1
net.ipv6.conf.all.accept_redirects = 0
net.ipv6.conf.all.disable_ipv6 = 1
net.ipv6.conf.all.forwarding = 0
net.netfilter.nf_conntrack_generic_timeout = 10
net.netfilter.nf_conntrack_tcp_timeout_close = 10
net.netfilter.nf_conntrack_tcp_timeout_close_wait = 12
net.netfilter.nf_conntrack_tcp_timeout_fin_wait = 12
net.netfilter.nf_conntrack_tcp_timeout_max_retrans = 12
net.netfilter.nf_conntrack_tcp_timeout_syn_recv = 12
net.netfilter.nf_conntrack_tcp_timeout_syn_sent = 24
net.netfilter.nf_conntrack_tcp_timeout_time_wait = 12
net.netfilter.nf_conntrack_tcp_timeout_unacknowledged = 12
net.nf_conntrack_max = 1000000
Değerler hakkında,
http://lartc.org/howto/lartc.kernel.obscure.html
sayfasında bilgi mevcut.
reklam
Bu günde vericad programının reklamını yapmak istiyorum.
Neden mi, çünkü linux sürümü ve desteği var.
Netcad, autocad kullanan arkadaşlar, vericad programını linux altında kullandınız mı?
Kullanmadıysanız, kendi kurallarınızı aşarak, vericad bir denemeye nedersiniz?
Kendinizi aşmaya ve vericad denemeye cesaretiniz var mı?
Neden mi, çünkü linux sürümü ve desteği var.
Netcad, autocad kullanan arkadaşlar, vericad programını linux altında kullandınız mı?
Kullanmadıysanız, kendi kurallarınızı aşarak, vericad bir denemeye nedersiniz?
Kendinizi aşmaya ve vericad denemeye cesaretiniz var mı?
laptop ile basit bir ağ testi
Evdeki atom n330 sistem ile laptop arasındaki ağ performanısı basit bir teste tutayım dedim.
Test sonucu;
Atom sunucudaki komut; ~/netperf-2.4.5# /usr/local/bin/netserver
Starting netserver at port 12865
Starting netserver at hostname 0.0.0.0 port 12865 and family AF_UNSPEC
atom sunucu oldu.
laptop kullanıcı taraf oluyor;
Komut...........: netperf -H172.16.250.254 -P12865 -l60 -c -C
TCP STREAM TEST from 0.0.0.0 (0.0.0.0) port 0 AF_INET to 172.16.250.254 (172.16.250.254) port 0 AF_INET : demo
Recv Send Send Utilization Service Demand
Socket Socket Message Elapsed Send Recv Send Recv
Size Size Size Time Throughput local remote local remote
bytes bytes bytes secs. 10^6bits/s % S % M us/KB us/KB
128000 16384 16384 60.00 934.71 35.25 53.35 6.179 18.701
Komut...........: netperf -H172.16.250.254 -P12865 -l60 -c yerel_cpu -C uzak_cpu
TCP STREAM TEST from 0.0.0.0 (0.0.0.0) port 0 AF_INET to 172.16.250.254 (172.16.250.254) port 0 AF_INET : demo
Recv Send Send Utilization Service Demand
Socket Socket Message Elapsed Send Recv Send Recv
Size Size Size Time Throughput local remote local remote
bytes bytes bytes secs. 10^6bits/s % S % M us/KB us/KB
128000 16384 16384 60.00 935.31 36.70 45.54 6.429 15.954
Buraya bakarak şunu diyebiliriz, ufak işyerleri için atom n330 veya yeni "Intel® Atom™ processor D525" işlemcili sistemleri router, firewall veya yönetilebilir switch olarak kullanabiliriz.
11 Temmuz 2011 Pazartesi
nautilus - %100 cpu
Bu gün bilgisayarım fırın gibi ısınmaya başladı.
cpu %100 ne kullanıyor diye baktığımda nautilus kullandığını gördüm.
Nedeni ise ev dizininde ne var, ne yok diye taraması...
Gnome kullanıyorsanız ev dizininizde fazla miktarda dosya bulundurmamak gerekiyormuş...
cpu %100 ne kullanıyor diye baktığımda nautilus kullandığını gördüm.
Nedeni ise ev dizininde ne var, ne yok diye taraması...
Gnome kullanıyorsanız ev dizininizde fazla miktarda dosya bulundurmamak gerekiyormuş...
8 Temmuz 2011 Cuma
sistem hakkında bilgi
5 Temmuz 2011 Salı
Linux eğitimi ve sertifikası şart mı?
Yıllardır linux kullanan ve linux üzerine çalışan bir çok kişi(benim gibi),
herkesin kendi imkanları ile linux öğrenip, sistem yöneticisi olabileceğini söyleyebilir, doğrudur. Fakat bir bilinmeyen üzerine kendi imkanlarımızla, kendimizi geliştirmek çok fazla zaman alır. Çoğu zamanda yaptığımız yanlışları, tecrube ediniriz... Bundan dolayı imkanı olan arkadaşlara linux sistem yöneticiliği eğitimi (novel, redhat, oracle) almalarını tavsiye ederim.
Böylelikle linux ortamına daha çabuk alışır, asla geri gelmeyecek olan zamanlarınızı daha iyi değerlendirebilirsiniz.
Bu eğitimlerden bir tanesi olan, oracle linux eğitiminin tanıtım dökümanına baktım. Güzel bir eğitim sayılır.
Redhat tabanlı linux sistemleri yönetmek isteyen arkadaşlara tavsiye ederim.
Aşağıdakiler Oracle linux eğitimi dökümanından alınmıştır.
pdften kopyala-yapıştır yaptığımdan biraz dağınık duruyor.
Detaylı bilgi için oracle linux sayfasından inceleyebilir ve siteden pdf dosyasını indirerek daha rahat inceleyebilirsiniz.
Introduction .......................................................................................... 1
Comparing Oracle Linux 5 and Red Hat Enterprise Linux (RHEL) 5 ... 2
Checking the /etc/redhat-release File .............................................. 2
Checking for the redhat-release Package ....................................... 5
Checking the Version of the Distribution ......................................... 7
Unbreakable Enterprise Kernel ........................................................... 8
Unbreakable Enterprise Kernel, Compatibility, and Third-Party Software 8
For ISVs That Also Check the Linux Kernel Version ......................... 10
Full, Verified kABI Compliance .......................................................... 11
Compatibility ...................................................................................... 11
Downloading Source Code and Binaries ........................................... 12
Conclusion ......................................................................................... 12
For More Information ......................................................................... 12
Oracle Technical Article—Certification with Oracle Linux 5
Introduction
Oracle Linux is fully compatible—both source and binary—with Red Hat Enterprise Linux.
Partners testing and certifying their applications on Oracle Linux will, at most, simply
install their application on Oracle Linux and verify the information described in this article.
When using the Red Hat compatible kernel, Oracle Linux 5 is also fully kABI compatible
with Red Hat Enterprise Linux.
This article describes the key points that ISVs should consider when installing and
certifying their products on Oracle Linux 5.
1
Oracle Technical Article—Certification with Oracle Linux 5
Comparing Oracle Linux 5 and Red Hat Enterprise Linux
(RHEL) 5
Applications that run on RHEL will run on Oracle Linux. Trademarks and logos have been
removed from a small number of the packages. These are non-functional text or graphics
changes that in no way affect any program code, and they do not generate any compatibility
issues. Oracle has added its own text file, /etc/enterprise-release, so support teams
can easily identify that they obtained the code from Oracle.
The Edison Group ran independent tests to validate Oracle’s claim of compatibility: Read their
report, Oracle Unbreakable Linux: True Enterprise-Quality Linux Support (see page 15).
Oracle’s simple text changes that an installer program might encounter are listed in the following
sections.
Checking the /etc/redhat-release File
RHEL provides a text file called /etc/redhat-release, which contains a one-line string
identifying the specific distribution release. This file is part of the redhat-release package.
Oracle Linux 5 also contains a text file called /etc/redhat-release, which is installed by
a package called enterprise-release.
The following tables show the data that is present on the initial release of media for each of the
releases of Oracle Linux. As of Oracle Linux 5.3, Oracle retains the Red Hat content within the
file. Also shown is the file /etc/enterprise-release, which contains Oracle content.
2
Oracle Technical Article—Certification with Oracle Linux 5
RHEL 5 ORACLE LINUX 5
# rpm –qf /etc/redhat-release # rpm –qf /etc/redhat-release
redhat-release-5Server-5.0.0.9 enterprise-release-5-0.0.4
# cat /etc/redhat-release # cat /etc/redhat-release
Red Hat Enterprise Linux Server release Enterprise Linux Enterprise Linux Server
5 (Tikanga) release 5 (Carthage)
RHEL 5 UPDATE 1 ORACLE LINUX 5 UPDATE 1
# rpm –qf /etc/redhat-release # rpm –qf /etc/redhat-release
redhat-release-5Server-5.1.0.2 enterprise-release-5-0.0.7
# cat /etc/redhat-release # cat /etc/redhat-release
Red Hat Enterprise Linux Server release Enterprise Linux Enterprise Linux Server
5.1 (Tikanga) release 5.1
RHEL 5 UPDATE 2 ORACLE LINUX 5 UPDATE 2
# rpm –qf /etc/redhat-release # rpm –qf /etc/redhat-release
redhat-release-5Server-5.1.0.4 enterprise-release-5-0.0.9
# cat /etc/redhat-release # cat /etc/redhat-release
Red Hat Enterprise Linux Server release Enterprise Linux Enterprise Linux Server
5.2 (Tikanga) release 5.2
RHEL 5 UPDATE 3 ORACLE LINUX 5 UPDATE 3
# rpm –qf /etc/redhat-release # rpm –qf /etc/redhat-release
redhat-release-5Server-5.3.0.3 enterprise-release-5-0.0.17
# cat /etc/redhat-release # cat /etc/redhat-release
Red Hat Enterprise Linux Server release Red Hat Enterprise Linux Server release
5.3 (Tikanga) 5.3
(Carthage)
(Carthage)
(Tikanga)
3
Oracle Technical Article—Certification with Oracle Linux 5
RHEL 5 UPDATE 4 ORACLE LINUX 5 UPDATE 4
# rpm –qf /etc/redhat-release # rpm –qf /etc/redhat-release
redhat-release-5Server-5.4.0.3 enterprise-release-5-0.0.20
# cat /etc/redhat-release # cat /etc/redhat-release
Red Hat Enterprise Linux Server release Red Hat Enterprise Linux Server release
5.4 (Tikanga) 5.4
RHEL 5 UPDATE 5 ORACLE LINUX 5 UPDATE 5
# rpm –qf /etc/redhat-release # rpm –qf /etc/redhat-release
redhat-release-5Server-5.5.0.2 enterprise-release-5-0.0.22
# cat /etc/redhat-release # cat /etc/redhat-release
Red Hat Enterprise Linux Server release Red Hat Enterprise Linux Server release
5.5 (Tikanga) 5.5
RHEL 5 UPDATE 6 ORACLE LINUX 5 UPDATE 6
# rpm –qf /etc/redhat-release # rpm –qf /etc/redhat-release
redhat-release-5Server-5.6.0.3 enterprise-release-5-6.0.2
# cat /etc/redhat-release # cat /etc/redhat-release
Red Hat Enterprise Linux Server release Red Hat Enterprise Linux Server release
5.6 (Tikanga) 5.6 (Tikanga)
(Tikanga)
(Tikanga)
4
Oracle Technical Article—Certification with Oracle Linux 5
Checking for the redhat-release Package
Oracle Linux 5 does not include the redhat-release package. Oracle Linux 5 includes the
enterprise-release package, which provides a set of files equivalent to those in the
redhat-release package on RHEL.
RHEL 5 ORACLE LINUX 5
# # rpm –qa|grep redhat-release-5
rpm -qa|grep redhat-release-5
redhat-release-5Server-5.0.0.9
#
# rpm -qa|grep enterprise-release
enterprise-release-5-0.0.4
# rpm -q --provides enterprise-release
config(enterprise-release) = 6:5-0.0.4
enterprise-release
redhat-release
enterprise-release = 6:5-0.0.4
RHEL 5 UPDATE 1 ORACLE LINUX 5 UPDATE 1
# # rpm –qa|grep redhat-release-5
rpm -qa|grep redhat-release-5
redhat-release-5Server-5.1.0.2
#
# rpm -qa|grep enterprise-release
enterprise-release-5-0.0.7
# rpm -q --provides enterprise-release
config(enterprise-release) = 6:5-0.0.7
enterprise-release
redhat-release
enterprise-release = 6:5-0.0.7
5
Oracle Technical Article—Certification with Oracle Linux 5
RHEL 5 UPDATE 2 ORACLE LINUX 5 UPDATE 2
# # rpm –qa|grep redhat-release-5
rpm -qa|grep redhat-release-5
redhat-release-5Server-5.1.0.4
#
# rpm -qa|grep enterprise-release
enterprise-release-5-0.0.9
# rpm -q --provides enterprise-release
config(enterprise-release) = 6:5-0.0.9
enterprise-release
redhat-release
enterprise-release = 6:5-0.0.9
RHEL 5 UPDATE 3 ORACLE LINUX 5 UPDATE 3
# # rpm –qa|grep redhat-release-5
rpm -qa|grep redhat-release-5
redhat-release-5Server-5.3.0.3
#
# rpm -qa|grep enterprise-release
enterprise-release-5-0.0.17
# rpm -q --provides enterprise-release
config(enterprise-release) = 6:5-0.0.17
enterprise-release
redhat-release
enterprise-release = 6:5-0.0.17
RHEL 5 UPDATE 4 ORACLE LINUX 5 UPDATE 4
# # rpm –qa|grep redhat-release-5
rpm -qa|grep redhat-release-5
redhat-release-5Server-5.4.0.3
#
# rpm -qa|grep enterprise-release
enterprise-release-5-0.0.20
# rpm -q --provides enterprise-release
config(enterprise-release) = 6:5-0.0.20
enterprise-release
redhat-release
enterprise-release = 6:5-0.0.20
6
Oracle Technical Article—Certification with Oracle Linux 5
RHEL 5 UPDATE 5 ORACLE LINUX 5 UPDATE 5
# # rpm –qa|grep redhat-release-5
rpm -qa|grep redhat-release-5
redhat-release-5Server-5.5.0.2
#
# rpm -qa|grep enterprise-release
enterprise-release-5-0.0.22
# rpm -q --provides enterprise-release
config(enterprise-release) = 6:5-0.0.22
enterprise-release
redhat-release
enterprise-release = 6:5-0.0.22
RHEL 5 UPDATE 6 ORACLE LINUX 5 UPDATE 6
# # rpm –qa|grep redhat-release-5
rpm -qa|grep redhat-release-5
redhat-release-5Server-5.6.0.3
#
# rpm -qa|grep enterprise-release
enterprise-release-5-6.0.2
# rpm -q --provides enterprise-release
config(enterprise-release) = 6:5-6.0.2
enterprise-release
redhat-release
enterprise-release = 6:5-6.0.2
Checking the Version of the Distribution
An application may check for the version of the distribution. In this case, RHEL 5 returns
5Server, whereas Oracle Linux 5 returns 5.
RHEL 5:
# rpm -q --qf "%{version}\n" -f /etc/redhat-release
5Server
Oracle Linux 5:
# rpm -q --qf "%{version}\n" -f /etc/redhat-release
5
7
Oracle Technical Article—Certification with Oracle Linux 5
Applications using the %{version} rpm check simply need to check for 5, not 5Server.
The preceding items are the only major differences between RHEL 5 and Oracle Linux 5 that
might impact installation and certification. If your application installer depends on any of the
checks described above, you now have all the information needed to make the minimal changes
required to transparently run on both Oracle Linux 5 and RHEL 5.
Unbreakable Enterprise Kernel
In September of 2010, Oracle introduced the Unbreakable Enterprise Kernel for Oracle Linux.
You can read more about Unbreakable Enterprise Kernel here. Beginning with Oracle Linux 5.5,
customers have a choice when it comes to the kernel: strict compatibility with the Red Hat kernel
or a kernel optimized and recommended by Oracle for stability and performance.
Unbreakable Enterprise Kernel, Compatibility, and Third-Party Software
One of the main advantages of Unbreakable Enterprise Kernel is that it runs directly on Oracle
Linux 5. This means that you can benefit from significant performance improvements and new
features without the need to re-install the entire operating system. Because the operating system
itself is not replaced, third-party applications will run unchanged.
The Linux operating system is a modular system in which the kernel interacts with the hardware
and controls and schedules access to resources on behalf of applications. Applications run in
what’s called user space and call only a stable set of system libraries to ask for kernel services.
Figure 1 is a simplified diagram of the Linux operating system. Installing Unbreakable Enterprise
Kernel changes only the box labeled “Kernel.”
8
Oracle Technical Article—Certification with Oracle Linux 5
Figure 1. Linux Operating System
As you can see, installing a kernel does not change system libraries such as glibc, the interface
that nearly all applications, including Oracle Database, use. The glibc version is 2.5 before and
after you install Unbreakable Enterprise kernel on Oracle Linux 5.5.
The sysctl infrastructure to control kernel settings is also unchanged when you install
Unbreakable Enterprise Kernel.
In contrast, device drivers and other kernel modules are tightly coupled with the kernel and will
usually need to be recompiled when a new kernel is introduced.
9
Oracle Technical Article—Certification with Oracle Linux 5
For ISVs That Also Check the Linux Kernel Version
As of Oracle Linux 5 Update 5, there are three kernels options:
• Unbreakable Enterprise Kernel (2.6.32-x.y.z or newer)
• Red Hat compatible kernel (2.6.18-x.y.z.el5)
• Red Hat compatible kernel with Oracle bug fixes (2.6.18-x.y.z.n.m.el5)
As of Oracle Linux 5 Update 6, Unbreakable Enterprise Kernel is installed and booted by
default. The Red Hat compatible kernel is also installed, and you may configure the operating
system to boot with this kernel instead. The Unbreakable Enterprise Kernel is provided by the
kernel-uek package, whereas the Red Hat compatible kernel is provided by the kernel
package.
[root@localhost ~]# rpm -qa | grep kernel
kernel-uek-firmware-2.6.32-100.26.2.el5
kernel-uek-2.6.32-100.26.2.el5
kernel-2.6.18-238.el5
Unbreakable Enterprise Kernel is available only on the x86-64 platform. To determine whether
Unbreakable Enterprise Kernel is installed and running, look for a kernel release version of
2.6.32-100 or newer using the uname -r command:
# uname -r
2.6.32-100.26.2.el5
Also, make sure that the kernel package installed is called kernel-uek.
# rpm -qa | grep kernel-uek
kernel-uek-2.6.32-100.26.2.el5
kernel-uek-firmware-2.6.32-100.26.2.el5
For Oracle Linux 5 through Update 5, the default installed kernel is the Red Hat compatible
kernel, kernel-2.6.18-x.y.z.el5. When custom kernels are built for resolving
customer issues, any other sort of numbering might be used and should not necessarily be relied
upon. However, a standard RHN release kernel follows the format above.
The Oracle Linux 5 Red Hat compatible kernel with Oracle bug fixes keeps the exact same
kernel versions and adds more digits at the end to identify potential fixes incorporated. As
always, these fixes are applied only if they are critical fixes not yet applied by Red Hat, and Oracle
considers the fixes to be important for customer scenarios. Oracle always provides all fixes to
Red Hat and the community in the hope that they will be incorporated in a future release. Oracle
does not have more than a few patches applied at any given time.
10
Oracle Technical Article—Certification with Oracle Linux 5
For applications that ship binary kernel modules or check a specific kernel release, uname -r
or rpm -q kernel returns additional digits in the kernel version (as shown in the following
tables) only if the Red Hat compatible kernel with Oracle patches is installed. In this case, Oracle
appends additional digits to the end of the release number.
Patch files for Oracle-provided fixes are available at
http://oss.oracle.com/el5/oracle-provided-patches/.
The following table shows the expected output from uname -r on Red Hat Enterprise Linux
5 and Oracle Linux 5 running the Red Hat compatible kernel with Oracle bug fixes.
MINOR RELEASE RHEL 5 KERNEL ORACLE LINUX 5 — RED HAT COMPATIBLE KERNEL WITH ORACLE BUG FIXES
Update 1 2.6.18-53.el5 2.6.18-53.0.0.0.1.el5
Update 2 2.6.18-92.el5 2.6.18-92.0.0.0.1.el5
Update 3 2.6.18-128.el5 2.6.18-128.0.0.0.1.el5
Update 4 2.6.18-164.el5 2.6.18-164.0.0.0.1.el5
Update 5 2.6.18-194.el5 2.6.18-194.0.0.0.3.el5
Update 6 2.6.18-238.el5 kernel-2.6.18-238.0.0.0.1.el5
Full, Verified kABI Compliance
Oracle Linux 5 with a Red Hat compatible kernel is fully kABI compatible with RHEL 5. Scripts
are run to double-check whether any patches that were to be applied would have a chance of
breaking kABI.
Any comparison between any kernel of Oracle Linux 5 and RHEL 5 shows absolutely no
difference in kABI. Kernel modules built for any RHEL 5 kernel (since the original release) will
also load on any Red Hat compatible kernel released for Oracle Linux 5.
Compatibility
The preceding information compares Oracle Linux 5 and RHEL 5 and highlights areas of
importance to application vendors from a testing and certification point of view. If your
application relies on any of the examples above, you now have all the information needed about
any changes that are required to run your application on Oracle Linux.
If your application does not rely on any of the examples above, it will run transparently, and
Oracle is confident that re-certification is not necessary.
11
Oracle Technical Article—Certification with Oracle Linux 5
Downloading Source Code and Binaries
Oracle Linux source code is available for free for download at http://oss.oracle.com/el5/. The
binaries are freely downloadable at http://edelivery.oracle.com/linux. Oracle Linux 5 allows for
free re-distribution of both source and binaries.
Conclusion
Oracle Linux is fully compatible—both source and binary—with with Red Hat Enterprise Linux.
This article described key points that ISVs should consider when installing and certifying their
products on Oracle Linux 5.
For More Information
Here are additional resources.
• Visit the Oracle Unbreakable Linux Knowledge Zone on the Oracle PartnerNetwork to learn
how to accelerate market opportunity and lower the cost of providing Linux solutions and
support to users.
• For more information about becoming an Oracle partner, visit the Oracle PartnerNetwork.
• For information on the Oracle Unbreakable Linux support program, visit oracle.com/linux.
2 Temmuz 2011 Cumartesi
Hangi dosya hizmetini veya sistemini kullanmalıyım?
Son bir yıl içinde gördüm ki, dosya hizmet sunucusu olarak nfsv4 en iyisi.
şu anda nfsv4 en iyi performansıda solaris 11 express üzerinde gösteriyor.
1 GBitlik ethernette ~100Mbyte/s trafiği solaris 11 express dışındaki işletim sistemlerinde
(standart kurulumla, linux, freebsd, windows, windows7) elde edemedim.
Solarisi yazıp geliştirenleri tebrik etmek lazım, ağ hizmetlerini oldukça iyi geliştirmişler.
Özet olarak linux çok sevsemde, ağ dosya sunucusu olarak solaris 11 express + zfs kullanıyorum.
Dosya sistemini web üzerinden yönetim içinde napp-it(http://www.napp-it.org/index_en.html) kullanmaya başladım.
Öyle şaşalı özellikleri yok, fakat komut satırınada ihtiyaç duymuyorum.
Arşivleme için en iyi yöntemde yine solaris 11 express üzerinde zfs(dedup ve compression özelliği ile birlekte) kullanmak. Fakat burada gözümüzden kaçırmamamız gereken nokta, en az 4GB ram ve 4 çekirdekli, 2.5Ghz üzerinde bir cpu kullanmak gerekeceği. Aksi durumda yedekleme işlemleri tahmin ettiğinizden çok çok uzun sürer. Kişisel amaçlar için benim gibi intel atom(330) veya benzeri bir işlemci ve 2 GB ramınız varsa dedup ve compression özelliğini kapatmanızı şiddetle tavsiye ederim. Bu iki özellik kapalı oldumu performans tahmin edebileceğinizden çok çok iyi olur.
Linux üzerindeki en hızlı dosya sistemi ise btrfs.
Çok güzel özellikleri(şıkıştırma, ssd diskleri otomatik tanıması vs. gibi) var.
Bundan dolayı arasıra olabilecek sıkıntılara razıyım, en hızlı dosya sistemini kullanayım diyenler için.
Ara sıra çatlamalarından dolayı, btrfs den ext4 geri döndüm.
Linuxte hızlı dosya işlemleri yapmak istiyorsanız,
softraid, lvm kullanmadan direk ext4 kullanmak en güzeli.
yedeklilik ve büyük hacimli (tek diske sığmayacak kadar) alana ihtiyaç duyuyorsak, softraid işimizi görür.
linux üzerinde cluster kullanacaksakta yine nfs hala en iyi yol(bana göre).
Bazılarına göre ocfs güzel vs. olsada zaman zaman(Özellikle yoğun i/o) aşırı cpu kullanımı ve cuvallamalar gördüm...
Son söz olarak neye ihtiyacımız varsa ona göre işletim sistemi ve dosya sistemi seçmek en iyi yol görünüyor.
zfs dedup faydası
Yedekleme yaptığım bir sistemdeki durum;
[root@dea ~]# zpool list
NAME SIZE ALLOC FREE CAP DEDUP HEALTH ALTROOT
ambar 928G 501G 427G 53% 5.43x ONLINE -
arsiv 1.81T 897G 959G 48% 3.02x ONLINE -
root@dea ~]# zdb -D arsiv
DDT-sha256-zap-duplicate: 3631357 entries, size 392 on disk, 204 in core
DDT-sha256-zap-unique: 1262549 entries, size 507 on disk, 404 in core
dedup = 3.02, compress = 1.60, copies = 1.25, dedup * compress / copies = 3.86
[root@dea ~]# zdb -D ambar
DDT-sha256-zap-duplicate: 2663625 entries, size 305 on disk, 176 in core
DDT-sha256-zap-unique: 1579609 entries, size 408 on disk, 321 in core
dedup = 5.44, compress = 1.00, copies = 1.00, dedup * compress / copies = 5.44
Şayet bu yedeklemeleri, normal bir ext4 veya ufs dizinine kopyalayacak olsaydım,
şu an kullandığım sistemin depolama hacmi yetmeyecek, fazladan en az 4 adet 1 TB lik veya
2*2 TB lik diske ihtiyacım olacaktı....
29 Haziran 2011 Çarşamba

24 Haziran 2011 Cuma
23 Haziran 2011 Perşembe
vmware sanal makine diskini, virtualbox sanal makine diskine çevirmek
Bu gün firemon programını test edeyim dedim.
Gelin görünkü demo yu vmware sanal makinesi olarak yapmışlar..
Eeeee şimdi vmware mi kuracam dedim ve vmware makinesini nasıl vbox çevrilir araştırayım dedim.
Gördüm ki çok basitmiş...
1. qemu-img convert firemon-5.2.1.53.vmdk -O raw firemon-5.2.1.53.bin
2. vboxmanage convertfromraw firemon-5.2.1.53.bin firemon-5.2.1.53.vdi
Converting from raw image file="firemon-5.2.1.53.bin" to file="firemon-5.2.1.53.vdi"...
Creating dynamic image with size 64424509440 bytes (61440MB)...
Hepsi bu kadar. Artık virtualboxta bir sanal sunucu oluşturup, diski tanıttım ve demo başladı...
Debian paketlerinin içeriğindeki dosyaları listelemek, kontrol etmek
Komut...........: dpkg -S checksecurity
checksecurity: /usr/share/checksecurity/check-sockets
checksecurity: /usr/share/lintian/overrides/checksecurity
checksecurity: /usr/share/doc/checksecurity
checksecurity: /usr/sbin/checksecurity
checksecurity: /usr/share/doc/checksecurity/copyright
checksecurity: /etc/logrotate.d/checksecurity
aide-common: /usr/share/aide/config/aide/aide.conf.d/31_aide_checksecurity
checksecurity: /etc/checksecurity/check-setuid.conf
checksecurity: /usr/share/man/man8/checksecurity.8.gz
checksecurity: /usr/share/checksecurity
checksecurity: /etc/checksecurity/check-socket.conf
checksecurity: /etc/checksecurity.conf
checksecurity: /etc/checksecurity
checksecurity: /etc/checksecurity/check-passwd.conf
checksecurity: /etc/cron.weekly/checksecurity
checksecurity: /etc/checksecurity/check-diskfree.conf
checksecurity: /usr/share/doc/checksecurity/changelog.gz
checksecurity: /usr/share/checksecurity/check-setuid
checksecurity: /etc/cron.daily/checksecurity
checksecurity: /usr/share/checksecurity/check-diskfree
checksecurity: /usr/share/checksecurity/check-passwd
checksecurity: /usr/share/doc/checksecurity/README.Debian
Sunucu : e8730w
Kullanici : root
Saat : 03:05:41
Bulunulan Dizin : /tmp/xtables-addons-1.36
Komut...........: debsums checksecurity
/usr/sbin/checksecurity OK
/usr/share/man/man8/check-diskfree.8.gz OK
/usr/share/man/man8/checksecurity.8.gz OK
/usr/share/man/man8/check-passwd.8.gz OK
/usr/share/man/man8/check-setuid.8.gz OK
/usr/share/doc/checksecurity/changelog.gz OK
/usr/share/doc/checksecurity/README.Debian OK
/usr/share/doc/checksecurity/copyright OK
/usr/share/checksecurity/check-sockets OK
/usr/share/checksecurity/check-diskfree OK
/usr/share/checksecurity/check-setuid OK
/usr/share/checksecurity/check-passwd OK
/usr/share/lintian/overrides/checksecurity OK
22 Haziran 2011 Çarşamba


21 Haziran 2011 Salı
zfs
[root@test1 ~]# zdb arsiv -D
DDT-sha256-zap-duplicate: 2663735 entries, size 322 on disk, 179 in core
DDT-sha256-zap-unique: 1581858 entries, size 421 on disk, 322 in core
dedup = 4.57, compress = 1.63, copies = 1.00, dedup * compress / copies = 7.46
DDT-sha256-zap-duplicate: 2663735 entries, size 322 on disk, 179 in core
DDT-sha256-zap-unique: 1581858 entries, size 421 on disk, 322 in core
dedup = 4.57, compress = 1.63, copies = 1.00, dedup * compress / copies = 7.46
18 Haziran 2011 Cumartesi
web te gördüğüm en yüksek hız...
web üzerinden bir dosyayı alırken karşılaştığım en yüksek hızı söylemeden duramayacağım;
wget http://172.16.250.254/ubuntu/pool/main/l/linux/linux-headers-2.6.32-29_2.6.32-29.58_all.deb
--2011-06-18 16:16:54-- http://172.16.250.254/ubuntu/pool/main/l/linux/linux-headers-2.6.32-29_2.6.32-29.58_all.deb
Connecting to 172.16.250.254:80... connected.
HTTP request sent, awaiting response... 200 OK
Length: 10132364 (9.7M) [application/octet-stream]
Saving to: `linux-headers-2.6.32-29_2.6.32-29.58_all.deb'
100%[=======================================================================================================================================>] 10,132,364 --.-K/s in 0.1s
2011-06-18 16:16:54 (97.9 MB/s) - `linux-headers-2.6.32-29_2.6.32-29.58_all.deb' saved [10132364/10132364]
Sunucu : e8730w
Kullanici : rx
Saat : 04:24:31
Bulunulan Dizin : /tmp
Komut...........: wget http://172.16.250.254/ubuntu/pool/main/l/linux/linux-source-2.6.38_2.6.38-10.44_all.deb
--2011-06-18 16:25:42-- http://172.16.250.254/ubuntu/pool/main/l/linux/linux-source-2.6.38_2.6.38-10.44_all.deb
Connecting to 172.16.250.254:80... connected.
HTTP request sent, awaiting response... 200 OK
Length: 80888814 (77M) [application/octet-stream]
Saving to: `linux-source-2.6.38_2.6.38-10.44_all.deb'
100%[=======================================================================================================================================>] 80,888,814 49.5M/s in 1.6s
2011-06-18 16:25:44 (49.5 MB/s) - `linux-source-2.6.38_2.6.38-10.44_all.deb' saved [80888814/80888814]
Sunucu : e8730w
Kullanici : rx
Saat : 04:25:44
Bulunulan Dizin : /tmp
Komut...........: rm linux-source-2.6.38_2.6.38-10.44_all.deb
Sunucu : e8730w
Kullanici : rx
Saat : 04:25:52
Bulunulan Dizin : /tmp
Komut...........: wget http://172.16.250.254/ubuntu/pool/main/l/linux/linux-source-2.6.38_2.6.38-10.44_all.deb
--2011-06-18 16:25:57-- http://172.16.250.254/ubuntu/pool/main/l/linux/linux-source-2.6.38_2.6.38-10.44_all.deb
Connecting to 172.16.250.254:80... connected.
HTTP request sent, awaiting response... 200 OK
Length: 80888814 (77M) [application/octet-stream]
Saving to: `linux-source-2.6.38_2.6.38-10.44_all.deb'
100%[=======================================================================================================================================>] 80,888,814 95.5M/s in 0.8s
2011-06-18 16:25:57 (95.5 MB/s) - `linux-source-2.6.38_2.6.38-10.44_all.deb' saved [80888814/80888814]
Sunucu : e8730w
Kullanici : rx
Saat : 04:25:57
Bulunulan Dizin : /tmp
Komut...........:
Sunucu özellikleri;
root@solaris:~# prtdiag
System Configuration: Supermicro X7SLA
BIOS Configuration: American Megatrends Inc. 1.0c 12/14/2010
==== Processor Sockets ====================================
Version Location Tag
-------------------------------- --------------------------
Intel(R) Atom(TM) CPU 330 @ 1.60GHz CPU 1
==== Memory Device Sockets ================================
Type Status Set Device Locator Bank Locator
----------- ------ --- ------------------- ----------------
SDRAM in use 0 DIMM0 BANK0
unknown empty 0 DIMM1 BANK1
SDRAM in use 0 DIMM2 BANK2
unknown empty 0 DIMM3 BANK3
==== On-Board Devices =====================================
==== Upgradeable Slots ====================================
ID Status Type Description
--- --------- ---------------- ----------------------------
Disk ise c8t3d0
Web sunucu; Solaris 11 express üzerinde nginx 1.0.3
14 Haziran 2011 Salı
solaris üzerinde SAN disk kontrolü
Solaris üzerinde diskleri kontrol etmek için aşağıdaki komutlardan faydalanabiliriz;
#dmesg
#fcinfo hba-port
#cfgadm -l
#mpathadm list lu
#mpathadm list mpath-support
Ayrıntılı bilgiyi;
Solaris Fibre Channel and Storage Multipathing Administration Guide
sayfasından ulaşabiliriz.
#dmesg
#fcinfo hba-port
#cfgadm -l
#mpathadm list lu
#mpathadm list mpath-support
Ayrıntılı bilgiyi;
Solaris Fibre Channel and Storage Multipathing Administration Guide
sayfasından ulaşabiliriz.
11 Haziran 2011 Cumartesi
8 Haziran 2011 Çarşamba
Sun 7110 disk ünitesinin yeniden kurulması
Sun, hayatta iken ürettiği en güzel ürünlerden bir tanesi olan 7000 serisi ürünleri yeniden kurmak zorunda kalırsak ne yaparız?
1. Sistemi komple Oracle (artık sun öldü.) göndeririz.
2. Sistemi yeniden kurarız. Nasıl?
1. yolu Türkiyede uygulayacak olursanız, uzun zaman beklersiniz.
2. yolu uygulamaksa tam bir uzmanlık işi. Bu konuda bir iki ip ucu vereceğim.
Öncelikle Solaris 11 express kurulu bir sistemimiz olmalı.
Oracle supporttan indirdiğimiz en güncel 7000 serisi yamayı
(incelediğimizde görürüzki tam bir kurulum!!!) solaris 11 express üzerine aşagıdaki gibi yükleriz.
# gzip -d ak-nas-2010-08-17-3-1-1-1-28-nd.pkg.gz
# pkgadd -d ak-nas-2010-08-17-3-1-1-1-28-nd.pkg
tftpd-hpa yı ayarlarız;
TFTP_USERNAME="tftp"
TFTP_DIRECTORY="/tftpboot"
TFTP_ADDRESS="192.168.1.1:69"
TFTP_OPTIONS="--secure"
dhcp servisini ayarlarız;
ddns-update-style none;
option domain-name-servers 192.168.1.1, 160.75.100.20;
default-lease-time 60000;
max-lease-time 720000;
authoritative;
log-facility local7;
option searchlist code 119 = string;
option grubmenu code 150 = text;
subnet 192.168.1.0 netmask 255.255.255.0 {
range 192.168.1.100 192.168.1.200;
option routers 192.168.1.1;
server-name "192.168.1.1";
}
host seyyahi {
option host-name "zfs";
hardware ethernet 00:24:81:5e:f9:2a;
fixed-address 192.168.1.253;
server-name "192.168.1.1";
filename "ak-nas@2010.08.17.1.1,1-1.16-nd/pxegrub";
option grubmenu "ak-nas@2010.08.17.1.1,1-1.16-nd/menu.lst";
option dhcp-parameter-request-list = concat(option dhcp-parameter-request-list,bootmenu);
}
host 7110 {
option host-name "7110";
hardware ethernet 00:14:4F:EE:25:CF;
fixed-address 192.168.1.250;
server-name "192.168.1.1";
filename "ak-nas@2010.08.17.3.1,1-1.28-nd/pxegrub";
option grubmenu "ak-nas@2010.08.17.3.1,1-1.28-nd/menu.lst";
option dhcp-parameter-request-list = concat(option dhcp-parameter-request-list,bootmenu);
}
son olarakta bir web sunucu ayarlamamız lazım.
web sunucusu olarak nginx kullandım ve bu işlem için gerekli ayarları;
server {
listen 80; ## listen for ipv4; this line is default and implied
root /;
server_name 172.16.250.254;
location / {
root /;
autoindex on;
}
}
Artık sunucumuz biosundan agdan boot etmesini sağlayarak kurulumu yapabiliriz.
Açılısta grubun configfile yüklememiz gerekli bunun için grub geldiğinde;
root (nd)
config (nd)/ak-nas@2010.08.17.3.1,1-1.28-nd/menu.lst.SUNW,iwashi
komutları ile yükletmemiz gerekli.
Ben bu kadar uzun yazmamak için
ak-nas@2010.08.17.3.1,1-1.28-nd/menu.lst.SUNW,iwashi
dosyasını /tftpboot altına menu.7110.lst diye kopyalamıştım.
Sun solaris ve zfs ile bir dönem açmıştı.
inşaallah oracle bu dönemi dahada geliştirir.(Pek umudum yok...)

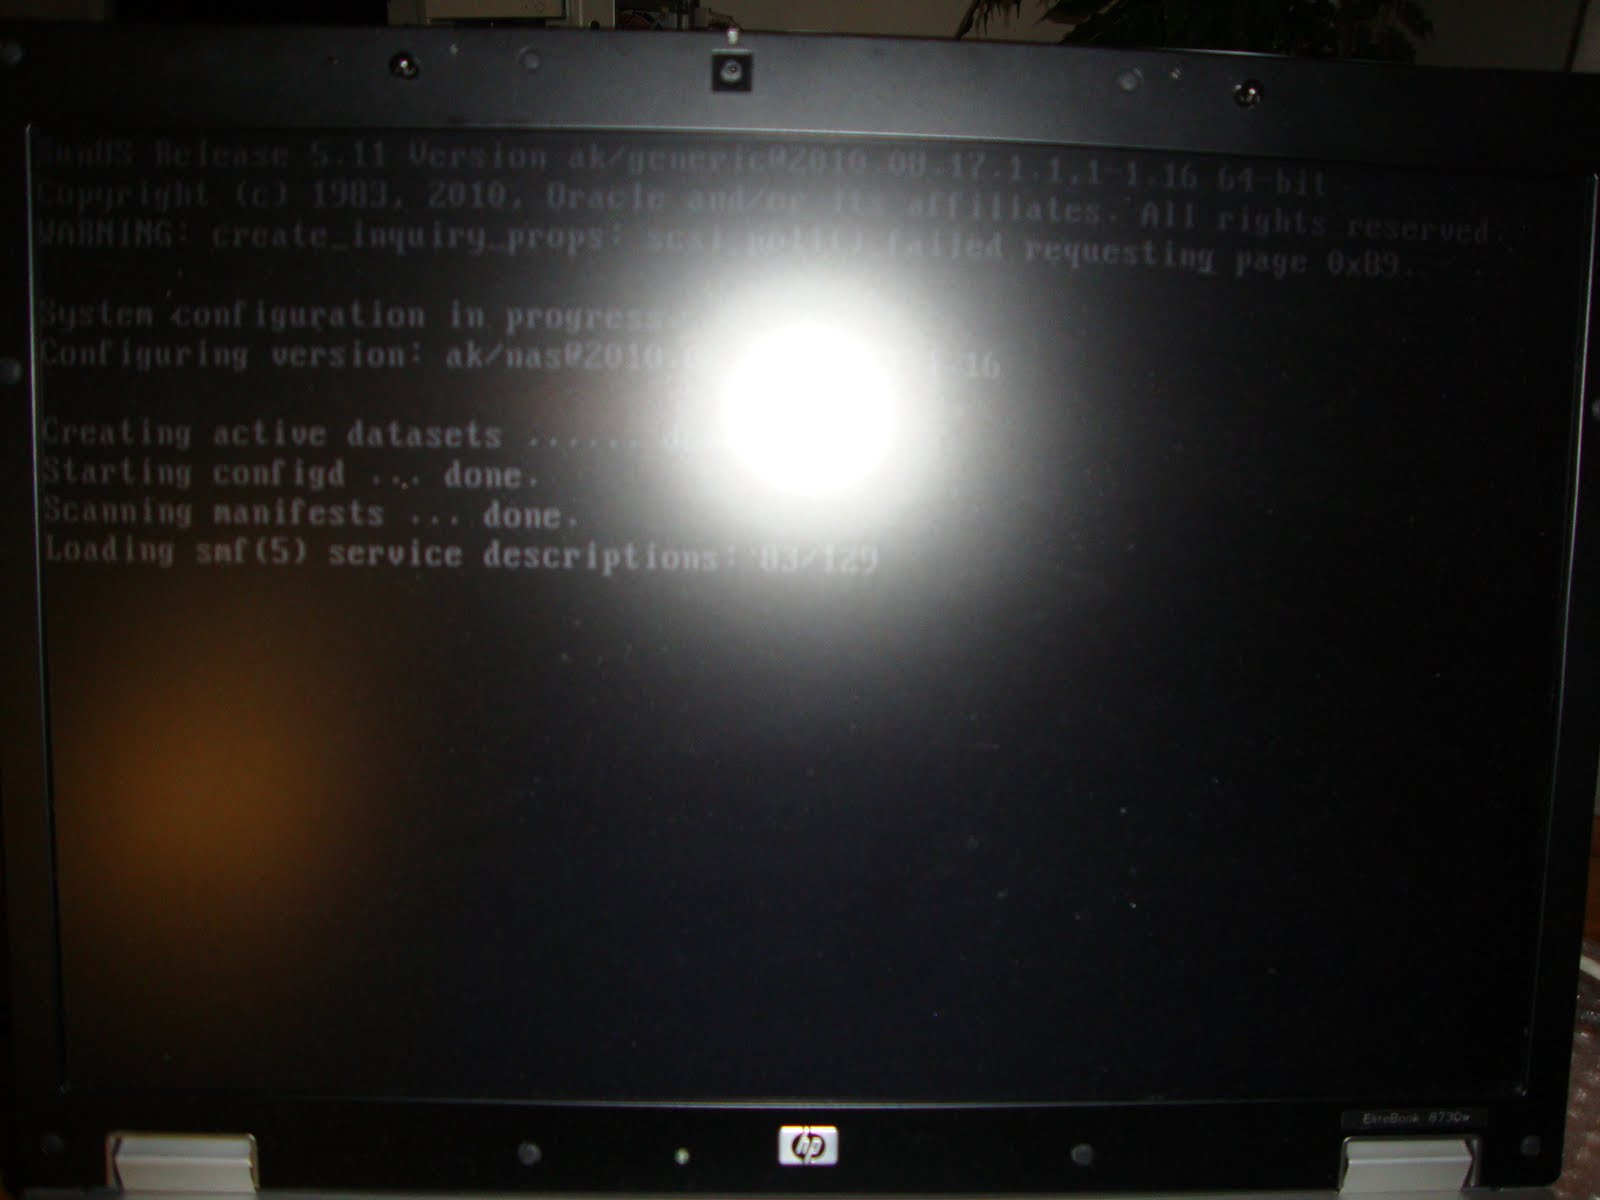


28 Mayıs 2011 Cumartesi
nanny
Evde, etrafta çolu çocuk var ve bilgisayarı kontrolsüz kullanmasınız diyorsanız,
nanny size yardımcı olacaktır.
http://linuxers.org/article/gnome-nanny-parental-control-system-linux
nanny size yardımcı olacaktır.
http://linuxers.org/article/gnome-nanny-parental-control-system-linux
24 Mayıs 2011 Salı
mysql reklamı
Her ne kadar reklam desemde, linkteki sunumlarda güzel bilgiler mevcut.
http://event.on24.com/eventRegistration/EventLobbyServlet?target=lobby.jsp&eventid=311656&sessionid=1&key=A39A8E5E260DF48790BF073CD6B31457&eventuserid=49467924
Umarım faydalı olur.
http://event.on24.com/eventRegistration/EventLobbyServlet?target=lobby.jsp&eventid=311656&sessionid=1&key=A39A8E5E260DF48790BF073CD6B31457&eventuserid=49467924
Umarım faydalı olur.
17 Mayıs 2011 Salı
Taşınabilir bilgisayarda tek diske mahkummuyuz?
Çok uzun zaman olmasada, taşınabilir bilgisayarımda ssd kullanıyordum.
ssd kullanmak güzel fakat 120G her şeyi sığdırmak mümkün olmadığı gibi,
harici e-sata disk kutusu kullanmakta her zaman kolay, rahat olmuyor.
Durum böyle olunca bir taşınabilir bilgisayara iki disk takmak zorunlu hale geldi.
İyide bu zımbırtılarda tek disk yeri ve bir dvd/cd yeri var nasıl olacak bu iş?
dvd/cd den vazgeçerek. Zaten ne kadar kullanıyoruz ki!!!
Usb dvd/cd taşımak disk taşımaktan daha kolay değil mi?
dvd/cd den vazgeçtik geçmesinede, bu yere nasıl disk takacam?
yahoo/google aramalarım sonucu bulduğun en iyi çözüm;
http://www.newmodeus.com/shop/index.php?main_page=product_info&products_id=252&zenid=e3d3f1042d1899bdb35ce9141290a578
Bu newmodeus'cu amcalar, benim gibi insanların dertlerine çare olalım demişler.
Sağolsunlar...


3 Mayıs 2011 Salı
flash sorunu
ubuntu 11.04 kullanmaya başlamayla birlikte flash sorunu yaşamaya başladım.
http://labs.adobe.com/technologies/flashplayer10/square/
64 bitlik flashplayer yükleyerek sorunu aştım.
Sizlerde böyle sorun olursa 64 bitlik flashplayerı deniyebilirsiniz.
http://labs.adobe.com/technologies/flashplayer10/square/
64 bitlik flashplayer yükleyerek sorunu aştım.
Sizlerde böyle sorun olursa 64 bitlik flashplayerı deniyebilirsiniz.
1 Mayıs 2011 Pazar
Yepyeni bir site
Her hangi bir konuda işe ve işi yaptıracağınız birisine ihtiyacınız varsa,
http://www.isyapilir.com sitesine bakmaya ve üye olmaya nedersiniz?
http://www.isyapilir.com sitesine bakmaya ve üye olmaya nedersiniz?
23 Nisan 2011 Cumartesi
tshark
tshark -i wlan3 -f "host 1.2.3.4 and port 80" -c 1000 -w /tmp/test.dump
"Wireshark & Ethereal Network Protocol Analyzer Toolkit"
In these situations, it is best to use Tshark (the console-based version of
Wireshark) to do the actual capture and initial processing of the data. To cap-
ture from an interface to a file , use this command:
tshark –i -w
If you have a limited amount of space and/or want to limit the size of your
capture files, you can use the ring buffer functionality with Tshark to capture
from interface to capture files with a max-
imum size each and a base filename by executing the fol-
lowing at the command line:
tshark –i -w -b -a
filesize:
Once you have captured the data you need, you can use Tshark to reduce
the capture to a more manageable size. To use a display filter string to filter a capture file and save the results to a new capture
file, execute the following at the command line:
tshark –r -w -R
If you need to extract all packets from the capture file that were cap-
tured between Jan 8, 2004 22:00 and Jan 8, 2004 23:00, execute the fol-
lowing command:
tshark –r -w -R '(frame.time >= "Jan 8, 2004
22:00:00.00" ) && (frame.time <= "Jan 8, 2004 23:00:00.00")'
Once you have reduced the data down to a size where Wireshark’s per-
formance is workable, open the Capture file in Wireshark to perform more
involved analysis.
"Wireshark & Ethereal Network Protocol Analyzer Toolkit"
In these situations, it is best to use Tshark (the console-based version of
Wireshark) to do the actual capture and initial processing of the data. To cap-
ture from an interface
tshark –i
If you have a limited amount of space and/or want to limit the size of your
capture files, you can use the ring buffer functionality with Tshark to capture
from interface
imum size each
lowing at the command line:
tshark –i
filesize:
Once you have captured the data you need, you can use Tshark to reduce
the capture to a more manageable size. To use a display filter string
file
tshark –r
If you need to extract all packets from the capture file that were cap-
tured between Jan 8, 2004 22:00 and Jan 8, 2004 23:00, execute the fol-
lowing command:
tshark –r
22:00:00.00" ) && (frame.time <= "Jan 8, 2004 23:00:00.00")'
Once you have reduced the data down to a size where Wireshark’s per-
formance is workable, open the Capture file in Wireshark to perform more
involved analysis.
Kaydol:
Kayıtlar (Atom)